- Home
- Jewelry Metal Finishing Instructions
Jewelry Metal Finishing Instructions
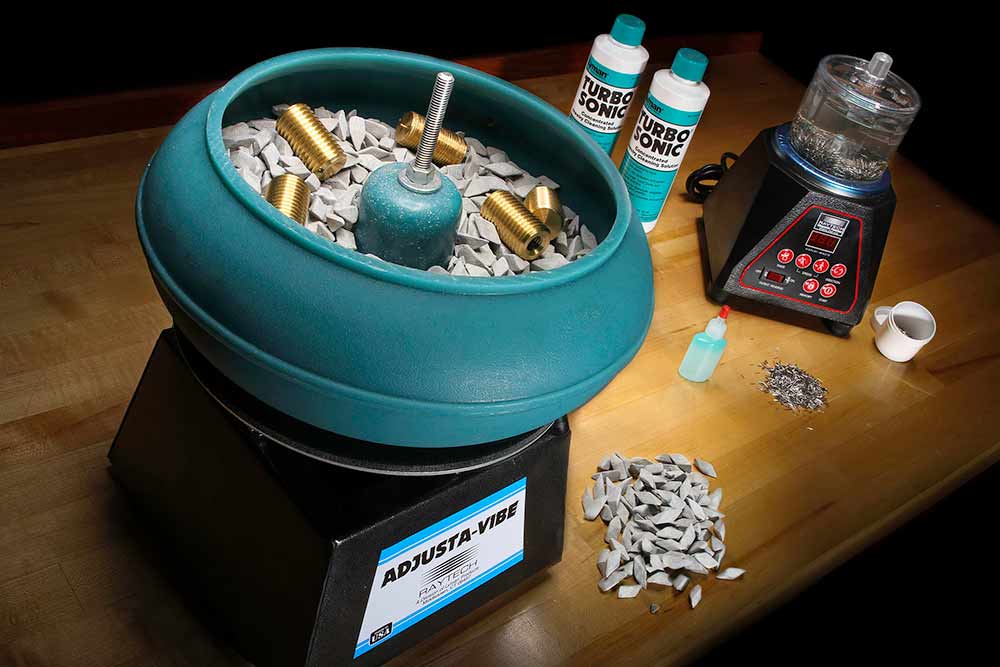
Raytech's 3-step jewelry metal finishing system has produced superior results on metals including silver, gold, pewter, bronze, brass, etc. The instructions below are specifically for finishing jewelry castings and stampings.
Successful vibratory finishing of most jewelry metal parts requires that parts first be filed, sanded or ground to smooth over any rough areas and to remove any remains of casting sprues.
PREPARATORY SMOOTHING
Metal parts can be suitably smoothed by any of the following:
- File (#2 cut or finer)
- Emery cloth or paper (medium or fine grit)
- Rubberized grinding wheel (such as a medium Cratex wheel)
Attempting to finish jewelry parts without adequate preparatory finishing can result in very long cycles with excessive loss of detail and shape to the parts. Following the preparatory smoothing, most metal jewelry parts can be finished in three additional steps as follows.
STEP 1: CUTTING
The cutting process will remove a small amount of metal, but as stated above, top quality results require preliminary smoothing before the vibratory process is started. The time needed for the cutting step will vary considerably, depending on the condition of the jewelry pieces. Step 1 uses special non-loading one-quarter-inch Green Pyramid media filled with a fine silica cutting abrasive specially designed for jewelry finishing. The use of media filled with silicon carbide or most alumina powders is not recommended as these will impinge and impregnate the metal surface and interfere with subsequent finishing steps.
In Step 1, the parts are tumbled until the surface is smooth (approximately 3 to 8 hours). NOTE: All plastic media should be broken in before using. Media that is not broken in may cause scratches.
To break in the media, place it in the tumbler bowl. Add water and Raytech Compound D (Item #41-006) cutting/burnishing soap - refer to table below for correct amounts. Tumble without jewelry for about one to two hours to allow the media to break in. Following break in, rinse the media and bowl well. Rinsing the media in a colander under running water works well. After rinsing, drain the media and put it back into the bowl. As the media is already wet, only about half the amount of water will be required, but do add the correct amount of soap. You are now ready to process your jewelry pieces. A good rule of thumb is to have 70% media and 30% parts. Too many pieces tumbling at once will impact each other and produce a poor finish.
| Model | Water | Compound D | Capacity |
| TV-5 | 1-1/2oz | 1/2 teaspoon | 0.05 cu ft. |
| TV-10 | 3 oz | 1 teaspoon | 0.10 cu ft. |
| AV-18 | 4 oz | 1-1/2 teaspoons | 0.18 cu ft. |
| AV-25 | 5 oz | 2 teaspoons | 0.25 cu ft. |
As the cutting step progresses, you will probably have to add a small amount of water to keep the media rolling well. As soon as appreciable sludge is produced by the cutting action, the soapsuds will turn gray and the rolling action may slow down considerably. It will then be necessary to rinse the sludge out of the bowl, media and parts and start again with new water and soap, as above. If the machine is allowed to tumble too long without changing the soap, the jewelry pieces will take on a gray color that is very difficult to remove.
We do not recommend tumbling for more than about three hours without rinsing the media and adding new soap. NOTE: If the machine does not roll the media well at the start of a cycle or after the soap solution is changed, there is probably too much water and/or soap.
When you are satisfied that the cutting cycle is complete, clean out the bowl and rinse the jewelry pieces and media well. Separate the jewelry and store the cutting media in a closed plastic container.
STEP 2: PRE-POLISH
The pre-polish step removes very little metal, so do not start this stage until the cutting process has completely smoothed all rough areas of the metal parts. The pre-polish media is one-quarter inch White Pyramids filled with a very fine silica powder capable of producing a very fine finish ready for coloring. The pre-polish media should also be broken in. (Use the same process as for the Green Pyramids, above.)
When the media is ready, put the jewelry pieces and Compound D in the bowl as was done for the cutting process. Again, depending on the pieces being processed, the pre-polish step should take from 2 to 5 hours. Watch the soapsuds carefully and change soap and water (as above) if they show signs of breaking down — turning gray or losing suds. The jewelry pieces should have a bright matte finish when the pre-polish cycle is complete. Again, too much water or soap will hamper the rolling action of the media. When finished with this step, rinse the bowl and media/parts as before. Separate the jewelry and store the media in a plastic container or bag. Note: By using a Raytech Flow-Thru System 20 (Item #23-104) in conjunction with a model 10, 18 or 25, the problems associated with sludge and dirty, broken down soap solutions are eliminated. The Flow-Thru 20 automatically adds the proper amounts of water and soap to the media and parts and is constantly washing the mixture.
STEP 3: POLISHING (COLORING) - DRI-SHINE III
In Step 3, the bowl is filled to one-quarter inch below the center cone with Dri-Shine Ill (Item #41-266) and the jewelry parts and run until a high luster develops. If the pre-polish step was done well, the final luster may be expected in as little to 4 to 5 hours. Longer cycles may improve the results. Dri-Shine media is normally effective for at least 200 hours of use. Many users of this system run the Dri-Shine step overnight, as it is a dry process requiring no maintenance. It is advisable to store Dri-Shine media in a closed container to reduce evaporation of the polishing agent.
Raytech Industries
Division of Lyman Products Corporation
475 Smith Street
Middletown CT 06457 USA
Instruction # 04264R Rev 10/14